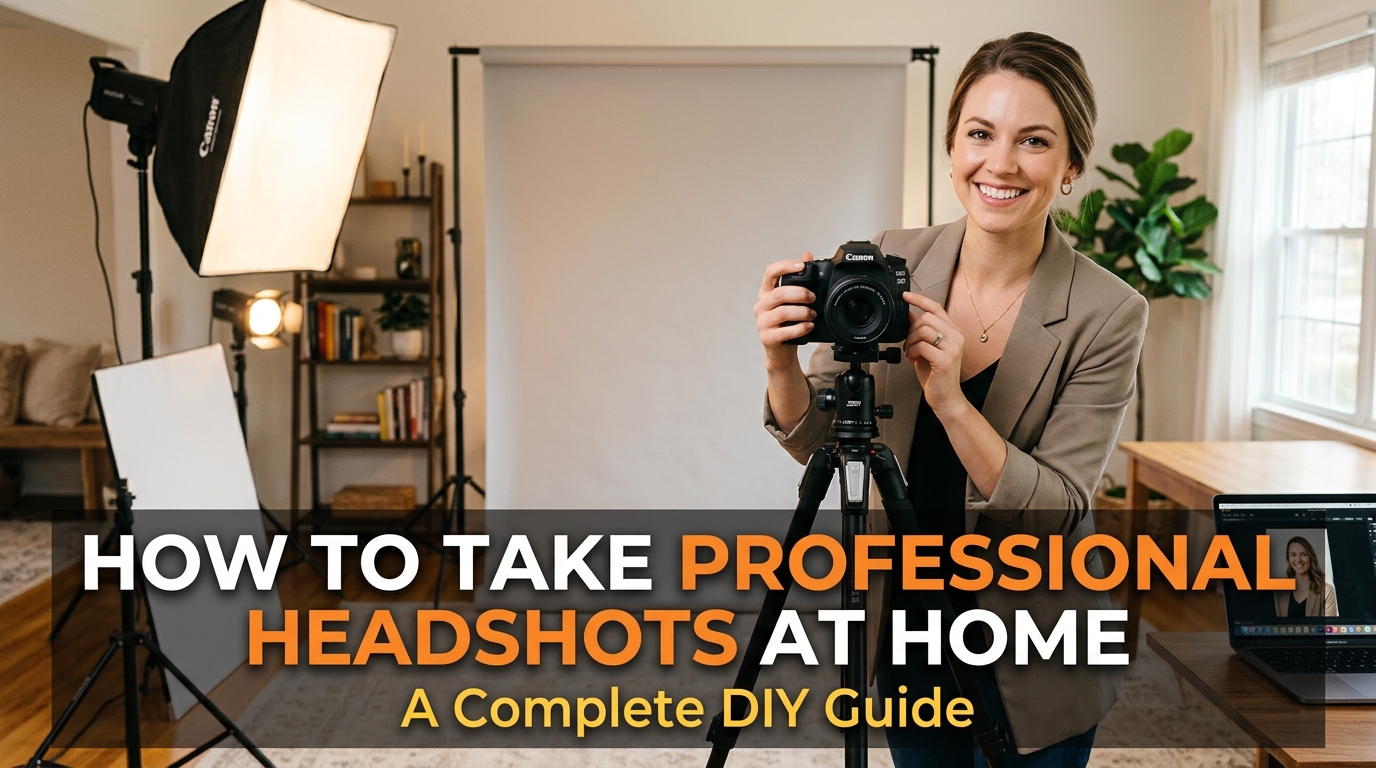
You don’t need a studio or an expensive camera. With the right light, a stable phone, simple framing, and a natural expression, you can take professional headshots at home.
If you need a new LinkedIn photo, company profile picture, speaker bio, resume photo, or personal-brand image, you can often make a good headshot at home. The camera is only one part of the equation. Light, camera position, framing, expression, and background usually make a bigger difference.
Quick answer: Put your phone on a stable support at eye level, face a large window for soft light, use a simple background, frame from the shoulders or upper chest up, and take several expressions. Then choose the sharpest, most natural image and make only subtle edits.
What Is a Headshot Photo?
A headshot photo is a close, intentional photograph of a person that is primarily used to represent them. In professional settings, it usually shows the head, shoulders, neck, and upper chest rather than the whole body.
That purpose is what separates a headshot from a casual selfie. A portrait can use the location, clothing, and body language to tell a larger story. A headshot usually removes those distractions so the viewer can recognize and assess the person quickly.
| Photo | Typical framing | Purpose |
|---|---|---|
| Professional headshot | Head and shoulders / upper chest | LinkedIn, company sites, resumes, speaker bios |
| Portrait | Anything from close-up to full body | Personal branding, editorial, storytelling |
| Selfie | Usually close and arm’s length | Casual or social use |
What Makes a Good Headshot?
A good professional headshot should make your face easy to recognize and give the right impression without looking over-produced. Current professional photography guidance consistently points to the same core qualities: sharp eyes, controlled light, a non-distracting background, a natural expression, a sensible crop, and an image that still looks like the person today.
1. Sharp, engaged eyes
Focus should land on the eyes. If the eyes are soft, the entire image can feel less intentional even when the rest of the photo is well composed.
2. Soft, controlled light
You want enough light to see facial detail without hard shadows or blown highlights. A large window is often the easiest source at home.
3. A quiet background
Your background should support the photo rather than become part of the story. A clean wall is often better than an attractive room full of visual clutter.
4. A natural expression
A professional expression does not have to mean a big smile. What matters is that you look relaxed, alert, and recognizable.
5. A useful crop
Head-and-shoulders framing gives you more flexibility than an extremely tight face-only crop, especially when a platform uses a square or circular profile image.
6. A current appearance
Your headshot should still look like you. If your hair, glasses, facial hair, or overall appearance has changed significantly, an older “perfect” photo may be less useful than a newer, slightly less polished one.
💡 The 10-second test: Shrink the photo until it is about the size of a LinkedIn profile image. Can you immediately see your face? Are the eyes clear? Is anything in the background competing with you? If the answer is yes, you are close.
How to Take Professional Headshots at Home?
Follow these steps in order, you can take a professional headshot at home by yourself. There is no reason to spend ten minutes changing camera settings if the person is standing under a ceiling light with a messy background.
Step 1: Find your best light
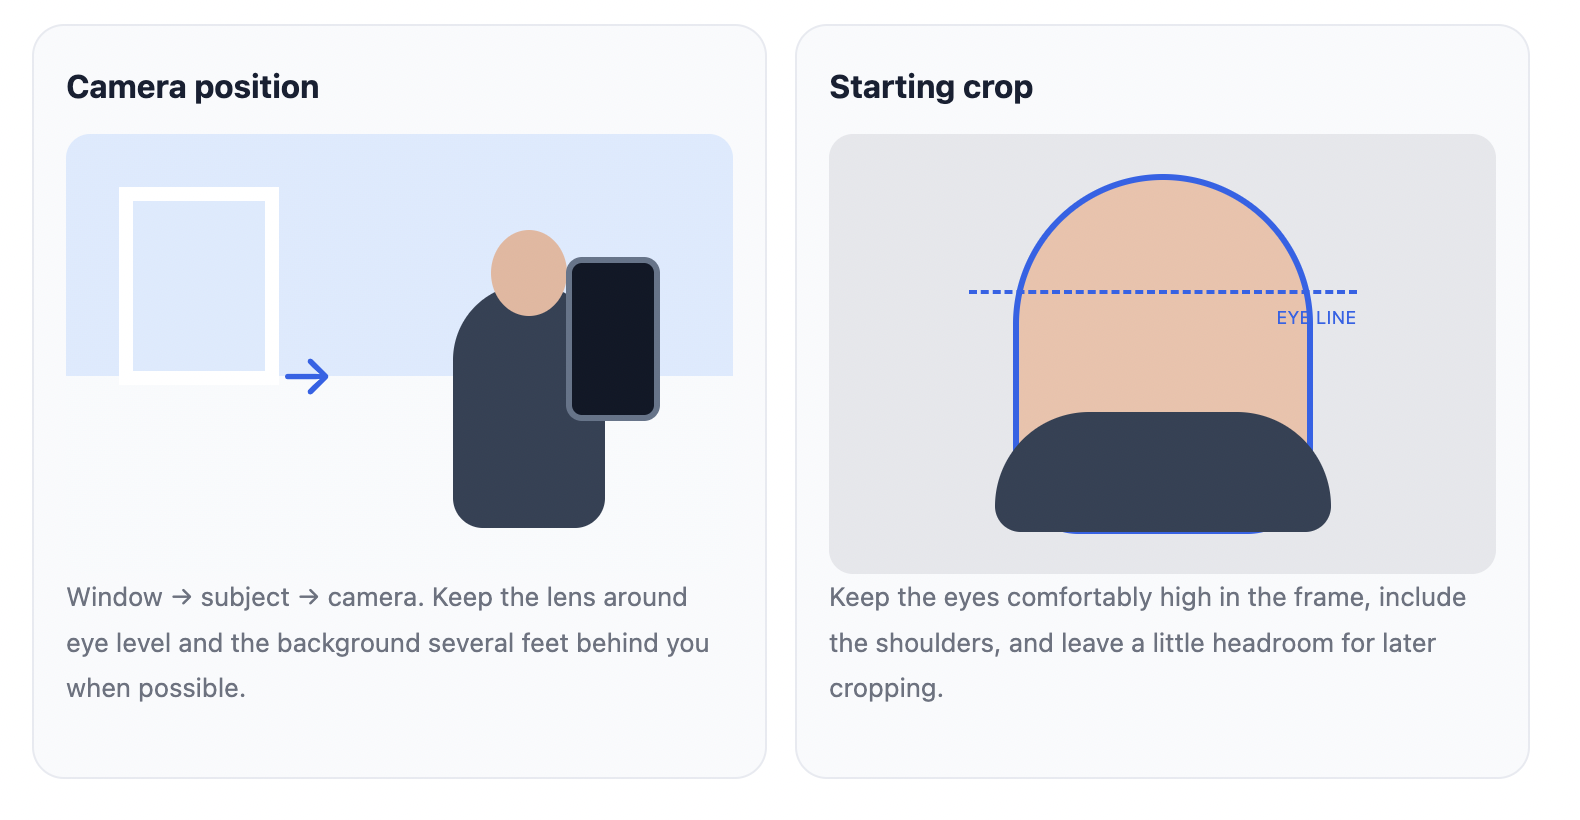
Start with a large window. Face the window or turn slightly toward it so the light reaches your face evenly. If the sun is harsh, use a sheer curtain to soften it. Turn off competing overhead lights.
Step 2: Choose a simple background
Use a plain wall, curtain, or other uncluttered surface. If possible, stand a few feet away from the background so your shadow is less obvious and the image has more separation.
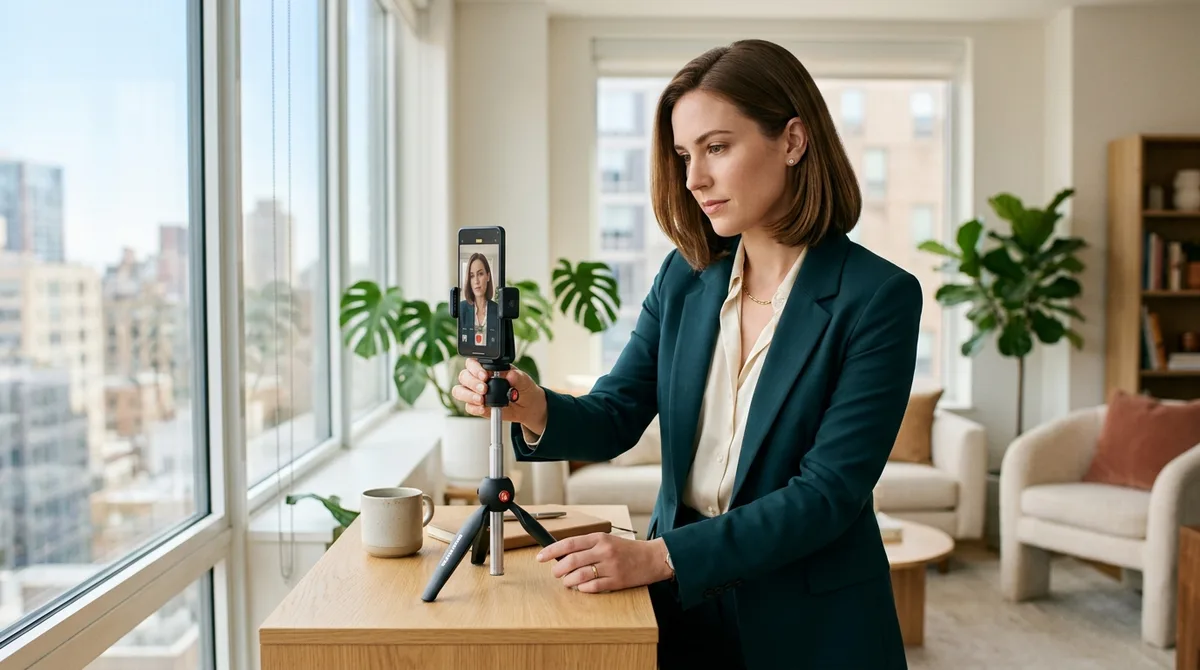
Step 3: Put the phone at eye level
Use a tripod, phone stand, shelf, or another stable support. The lens should be roughly level with your eyes. Avoid holding the phone at arm’s length.
Step 4: Set your frame
Start with a head-and-shoulders or upper-chest composition. Leave a little space above your head and enough room around the shoulders to crop later.
Step 5: Pose naturally
Relax your shoulders, turn your body slightly, bring your face toward the lens, and keep your chin in a neutral position. Take a few frames with different expressions rather than freezing one smile.
Step 6: Take multiple frames
Take 20–50 photos in short sets. Change one variable at a time—expression, head angle, or shoulder angle—so you can tell what actually works.
How to Take a Professional Headshot at Home on iPhone?
A recent iPhone can handle the image quality needed for most online professional profiles. The more important variables are distance, lens choice, camera height, light, and stability. Current 2026 iPhone guides also recommend the rear camera, eye-level framing, and focus/exposure lock.
Use the rear camera
The rear camera is generally preferable because it gives you better control and avoids the distortion that can happen when a front camera is held very close to the face.
Don’t stand too close
Wide-angle perspectives exaggerate whatever is closest to the lens. Instead of putting the phone right in front of your face, move it farther back and use a more normal field of view. If your phone has a 2x option that gives you a natural-looking perspective from a reasonable distance, it can be useful.
Lock focus and exposure
Tap and hold on your face to lock focus and exposure, then make a small exposure adjustment if your skin or white clothing is losing detail. The goal is accurate detail, not the brightest possible image.
Use a timer or remote
A two- or ten-second timer lets you settle your shoulders and expression before the shutter fires. A Bluetooth remote is even easier when you are taking dozens of frames.
| iPhone setting | Practical choice | Why |
|---|---|---|
| Camera | Rear camera | Better control and no arm’s-length selfie perspective |
| Lens | Standard or moderate telephoto | More natural facial proportions than very wide framing |
| Focus | Lock on face/eyes | Keeps the subject sharp |
| Exposure | Adjust carefully | Protects skin and clothing detail |
| Support | Tripod or stable surface | Prevents camera movement |
⚠️ Don’t obsess over one exact iPhone setting. Models and iOS versions differ. A sharp, natural-looking image matters more than copying a particular camera configuration from an older tutorial.
How Should You Frame a Professional Headshot at Home?
For a general professional profile, start with a head-and-shoulders or upper-chest crop. It is close enough to keep your face prominent but gives you room to adapt the image to different profile layouts.
Can a professional headshot be just your face?
Yes, but it is not always the most flexible choice. A tight face-only crop can work for some profiles, but including the shoulders gives the image more context and makes it easier to crop for square or circular profile formats.
How to Pose for a Professional Headshot at Home?
You do not need ten different poses. Most people get better results by making a few small adjustments and then moving naturally between them.
The simple five-point pose
- Relax your shoulders. Let them drop instead of pulling them back hard.
- Turn your body slightly. Ten to thirty degrees is enough to create some shape.
- Keep your face toward the lens. Your shoulders can be angled while your attention stays with the camera.
- Lengthen your neck. Think tall rather than stiff.
- Use a real expression. Think of a person or situation that makes you feel comfortable instead of holding a smile mechanically.
Try three expressions
- Neutral: useful for more formal industries.
- Slight smile: often a good middle ground for LinkedIn and company profiles.
- Natural smile: useful when approachability is part of your professional image.
📌 Don’t hold your smile. Move naturally between expressions and let the camera capture several moments. A genuine half-second expression often looks better than a smile held for thirty seconds.
What to Wear for Professional Headshots?
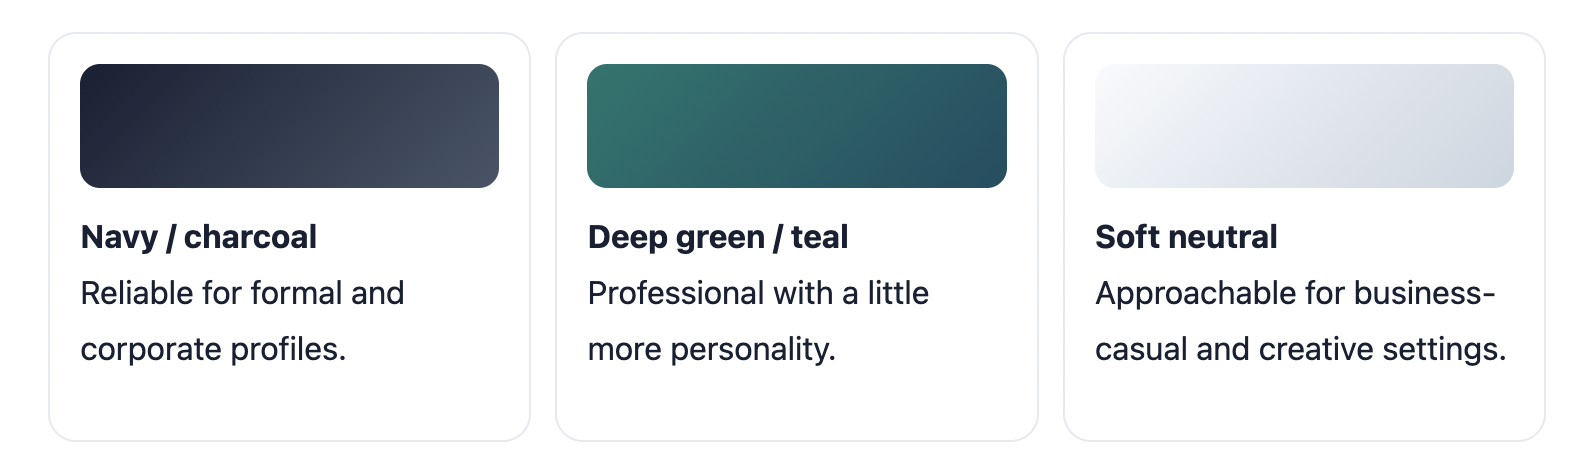
The best answer to what to wear for professional headshots is: wear something that fits the professional context you want to represent. There is no universal requirement to wear a suit. Current wardrobe guidance also emphasizes fit, simple colors, minimal distraction, and alignment with the industry.
What usually works
- Solid or low-contrast colors.
- Clothes that fit well at the shoulders and neckline.
- Simple layers such as a blazer, cardigan, or structured jacket.
- Colors that contrast with your background.
- Clothing you would actually wear in an important professional setting.
What usually distracts
- Tiny, dense patterns.
- Large logos or slogans.
- Wrinkled collars and jackets.
- Highly reflective jewelry.
- Clothing and background that are nearly identical in tone.
What to Wear for Professional Headshots — Female
For women, pay particular attention to the area closest to the face: neckline, shoulders, color, jewelry, and hair. A structured blazer over a simple top is one dependable option, but a clean blouse, dress, or knit can work just as well when it fits the professional context.
- Choose a neckline you normally feel comfortable wearing.
- Keep jewelry simple enough that it does not compete with the face.
- If glasses are part of your normal professional appearance, wear them.
- Style your hair as you normally would for an important workday.
- Choose makeup that defines rather than dramatically changes your appearance.
What to Wear for Professional Headshots — Male
- A pressed button-down is a dependable starting point.
- Add a blazer when a more structured look fits your industry.
- Wear a tie when it is genuinely part of your professional context.
- Check collars, facial hair, glasses, and stray hairs before shooting.
How to Choose the Best Headshot?
Taking the photos is only half the job. If you have 40 similar images, do not choose the one because you happened to like the first one.
Use this order
- Remove technically weak photos. Delete anything soft, blurry, badly exposed, or poorly framed.
- Compare expression. Which photo feels relaxed rather than performed?
- Compare eyes. Which frame has the clearest, most engaged eyes?
- Check posture. Are your shoulders relaxed and your head balanced?
- Check resemblance. Would someone who knows you recognize this as you?
💡 Ask one other person. Send your top three images to someone who knows you and ask: “Which one looks most like me on a good professional day?” That question is more useful than simply asking which photo is prettiest.
How to Edit a Professional Headshot?
Good editing is usually less noticeable than bad editing. Correct the things that distract from the photo; do not redesign your face.
Safe edits
- Exposure and white balance.
- Small contrast or color adjustments.
- Minor temporary blemish removal.
- Background cleanup when necessary.
- Crop and straightening.
Be careful with
- Heavy skin smoothing.
- Changing face shape.
- Changing eye or nose size.
- Extreme teeth whitening.
- Filters that substantially change skin tone.
For straightforward work, Lightroom is useful for color and exposure, Snapseed is convenient for local adjustments, and Canva can help with simple background or layout tasks. The tool matters less than restraint.
Checklist for Taking a Professional Headshot at Home
Before shooting
- [ ] Clean the phone lens.
- [ ] Choose the brightest useful window.
- [ ] Turn off competing overhead lights.
- [ ] Remove background clutter.
- [ ] Prepare one or two professional outfits.
- [ ] Put the phone on a stable support.
During shooting
- [ ] Camera is roughly at eye level.
- [ ] Face is evenly lit.
- [ ] Background is quiet.
- [ ] Eyes are sharp.
- [ ] Shoulders are relaxed.
- [ ] Try neutral, slight-smile, and natural-smile expressions.
- [ ] Take multiple frames.
Before publishing
- [ ] Photo looks current.
- [ ] Face is easy to recognize at small size.
- [ ] Crop works as a square or circle.
- [ ] Skin still looks like skin.
- [ ] No obvious editing or AI artifacts.
- [ ] Final image has enough resolution for the intended platform.
When DIY Is Not Enough — What About AI Headshot Generators?
Taking a professional headshot photo at home is a good option when you have decent lighting, a little time, and don’t mind setting things up yourself. It may not be the best choice if your room is difficult to light, you need several different professional looks, or you simply want a polished profile photo without setting up a mini studio.
That’s where an AI headshot generator can be useful. Instead of arranging a photo shoot, you can start with a photo you already have and create a professional-looking headshot wherever you are.
TeraBox AI Headshot Generator
TeraBox AI Headshot Generator is a simpler option when you already have a usable selfie but don’t want to arrange a full DIY shoot. You can start with one clear portrait, choose a template, or describe the kind of headshot you want with a prompt. TeraBox positions the tool for LinkedIn, resumes, social profiles, portfolios, and other professional uses.
How to Use TeraBox AI Headshot Generator?
The workflow is intentionally short. You don’t need to prepare a studio setup first—the main thing is to start with a clear photo that gives the AI enough information about your face.
Step 1: Upload One Clear Selfie
Choose a template, upload a clear portrait photo, or enter a prompt describing the headshot you want. For the best starting point, use a recent photo where your face is clearly visible, your features are not covered, and the image is not heavily filtered.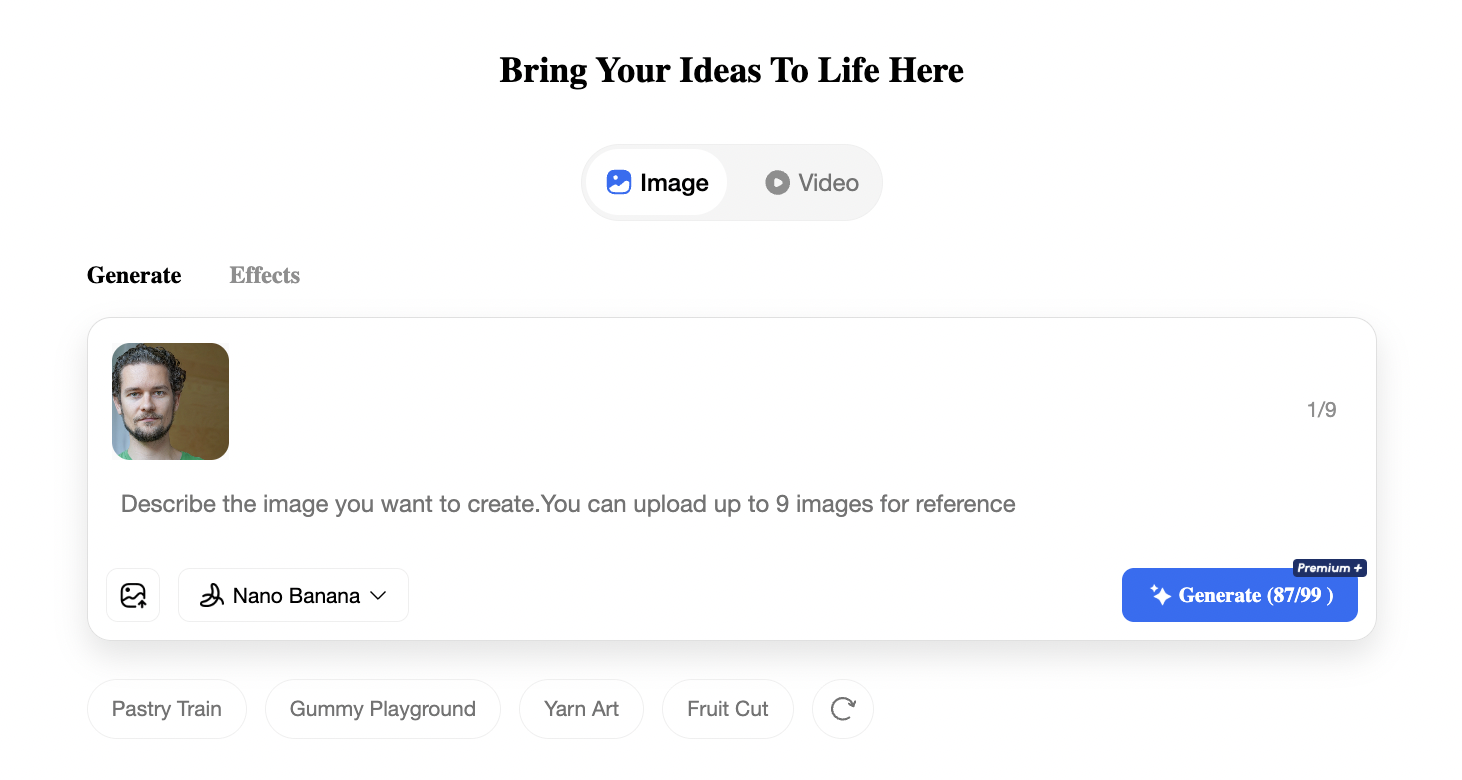
Step 2: Generate Your AI Headshot
Create the headshot and review the result. If the first version isn’t quite right, try another template, prompt, or style. TeraBox supports different directions such as formal, business-casual, creative, background, and lighting styles.
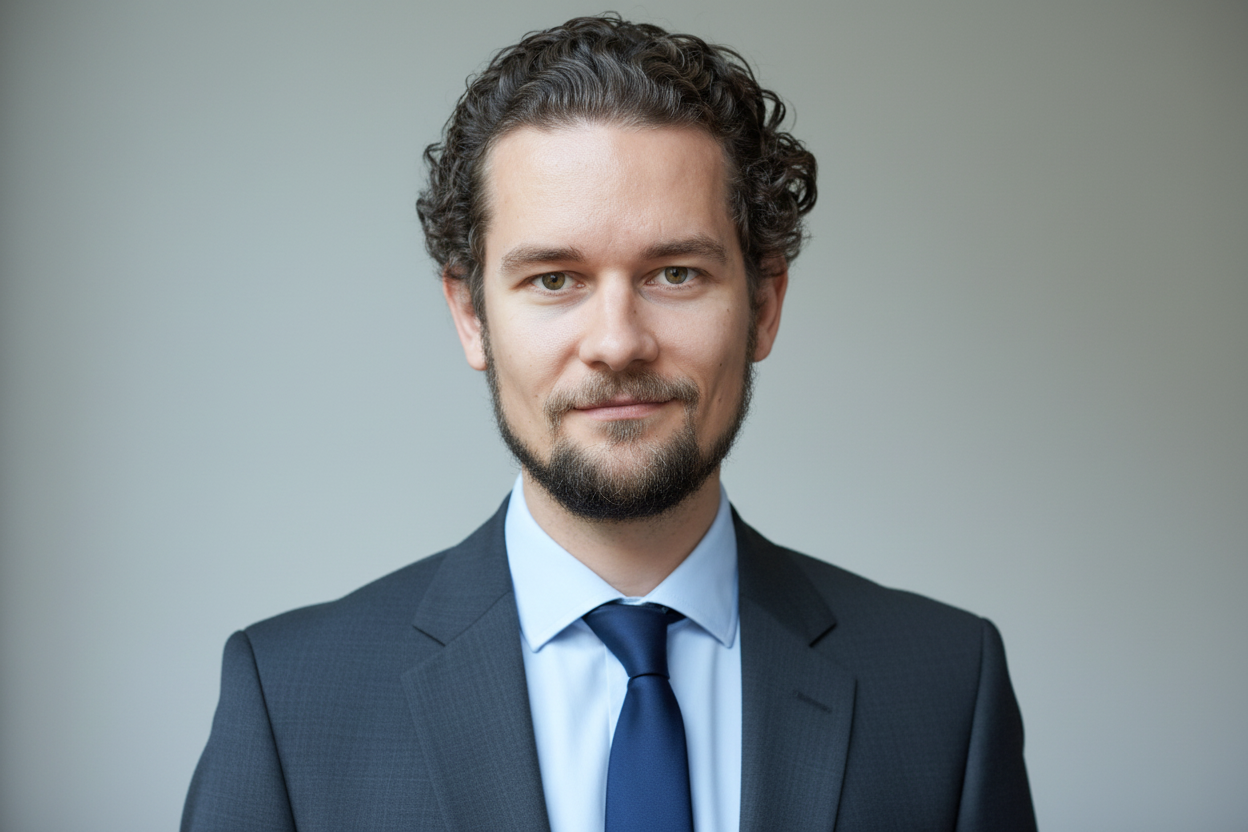
Step 3: Download and Use
Once you have a version you like, download the generated headshot and use it across your work profiles, social accounts, portfolio pages, or other appropriate professional contexts.
📌 What makes a good AI source photo? Think back to the DIY section above: clear face, recent appearance, reasonable lighting, and a natural angle. A better source image gives you a better starting point for evaluating the generated result.
Why Use TeraBox for AI Headshots?
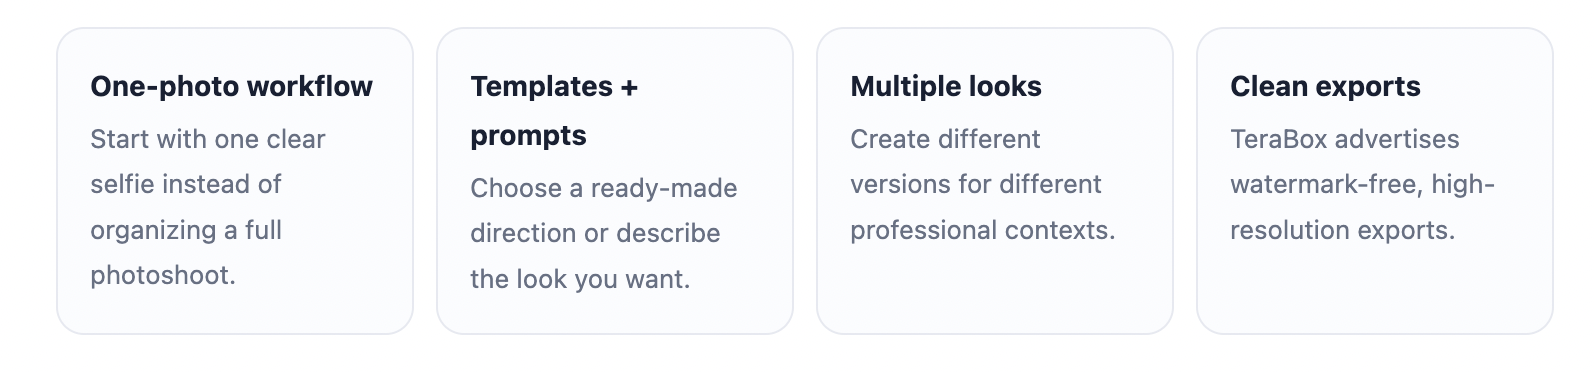
Another advantage is flexibility. You may want a more formal version for a resume, a friendlier look for LinkedIn, or a slightly more creative image for a personal website. TeraBox’s current product page specifically highlights generating different versions for different profiles rather than forcing one image to fit every context.
Read more about TeraBox: TeraBox August 2026 Product Updates
Already have a decent photo? Skip the DIY setup.
If your camera roll already contains a clear portrait, use it as the starting point for a polished professional headshot instead of setting up lights, a tripod, and a background.
Try TeraBox AI Headshot Generator →
Other AI Headshot Generators to Consider
TeraBox isn’t the only option. If you want to compare a few dedicated AI headshot services, these are worth knowing about. The right choice depends on whether you care most about realism, style variety, team workflows, or editing options.
| Tool | Good fit for | What stands out |
|---|---|---|
| Aragon AI | Individuals who want lots of professional looks | Known for a large range of styles and high-fidelity business portraits; current 2026 comparisons describe it as particularly strong for natural-looking results and variety. |
| BetterPic | People who want customization and higher-resolution output | Offers a large style library and options for AI or human editing; its current site highlights 150+ styles and outputs in under an hour. |
| HeadshotPro | Companies and teams | Particularly focused on business headshots and team workflows, including centralized team management and consistent styles. |
Tip: Before uploading personal photos to any AI service, check its current privacy, retention, training, commercial-use, and deletion policies. These terms can change, and your face is sensitive personal data.
How to choose a good source photo?
- Use a recent photo.
- Make sure your face is clearly visible.
- Avoid extreme wide-angle selfies.
- Avoid sunglasses, heavy filters, or anything covering your facial features.
- Use a photo with reasonably even light when possible.
Check an AI-generated headshot before using it
Do not assume that a polished-looking AI result is automatically usable. Zoom in and check the eyes, teeth, glasses, hair, clothing edges, skin texture, and background. Most importantly, ask whether the image still looks like you.
⚠️ Use AI as a convenience, not a reason to misrepresent yourself. For a professional profile, the generated image should remain recognizably consistent with your current appearance. For roles where exact physical appearance matters—such as acting, modeling, or identity-sensitive uses—a real photograph may be the better choice.
Where Can You Get Headshots Taken?
If taking your own photo is not convenient, there are four common options:
- At home: the lowest-cost route if you can control light and framing.
- A photographer: the best option when you want human direction and a real photographic session.
- A studio or mini-session: useful when you want professional equipment without booking a large branding shoot.
- An AI headshot generator: useful when speed and variety matter more than having a real studio session.
How Much Is a Professional Headshot?
There is no single worldwide price. Location, photographer experience, session length, number of final images, retouching, and whether you are buying a simple headshot or a broader branding session can all change the cost.
For a US reference point, one 2026 photographer source reports $400–$1,500 for a session plus two to four retouched images, with a median around $700. That is a market reference rather than a universal price; local photographers and shorter sessions can be substantially cheaper, while premium executive work can cost more.
| Option | Typical trade-off | Best for |
|---|---|---|
| DIY | Low cost, more effort | Budget-conscious profile refresh |
| Mini-session | Moderate cost, limited time | Quick professional update |
| Photographer | Higher cost, expert direction | Executive or personal branding |
| AI | Low effort, generated rather than photographed | Fast online profile images |
FAQs about Getting Professional Headshots at Home
Can I take a professional headshot at home?
Absolutely. You can take one yourself with a phone or camera by following the steps above. Or, simply upload your selfie to the TeraBox AI Headshot Generator and let AI create a professional headshot for you.
Is a white dress professional for a headshot?
Yes, it can be. A white dress looks best with a darker or simple background. Keep your accessories and makeup simple so your face stays the focus.
How to take professional headshots at home by yourself?
Use natural light, a simple background, and a phone or camera on a tripod. Take several photos with different poses and choose the one that looks most natural.
Can I use an AI-generated headshot for LinkedIn?
Absolutely. An AI-generated headshot can work well for LinkedIn as long as it looks natural, professional, and clearly represents you. Choose a style that matches your industry and personal brand.
What does a good professional headshot look like?
It should be clear, well-lit, and focused on your face. A simple background and a natural, confident expression can make the photo look more professional.
How to dress for a professional headshot at home?
Choose clean, simple clothes in solid or neutral colors. Avoid busy patterns, large logos, or anything that takes attention away from your face.
What’s the best App for professional headshots?
There are many apps and AI tools you can try, such as TeraBox, Remini, Fotor, Aragon AI, and HeadshotPro. If you want a quick and easy option, TeraBox lets you upload a selfie and create a professional-looking headshot with AI.
How to take a professional headshot at home with AI?
Upload a clear selfie to any AI headshot generator and choose a style you like. Once your headshot is ready, you can save it to TeraBox to keep your photos backed up and easy to access.
What’s a quick way to get a professional headshot photo?
Take a clear selfie in good lighting and use an AI headshot generator. You can get a polished photo in just a few simple steps, without booking a photographer.
Conclusion
Getting a professional headshot doesn’t have to be expensive or complicated. Whether you take a professional headshot at home or use an AI headshot generator, a clear photo, good lighting, and a natural look can make a big difference. For a quick and easy option, try the TeraBox AI Headshot Generator to turn your selfie into a professional headshot for LinkedIn, resumes, and other professional profiles.