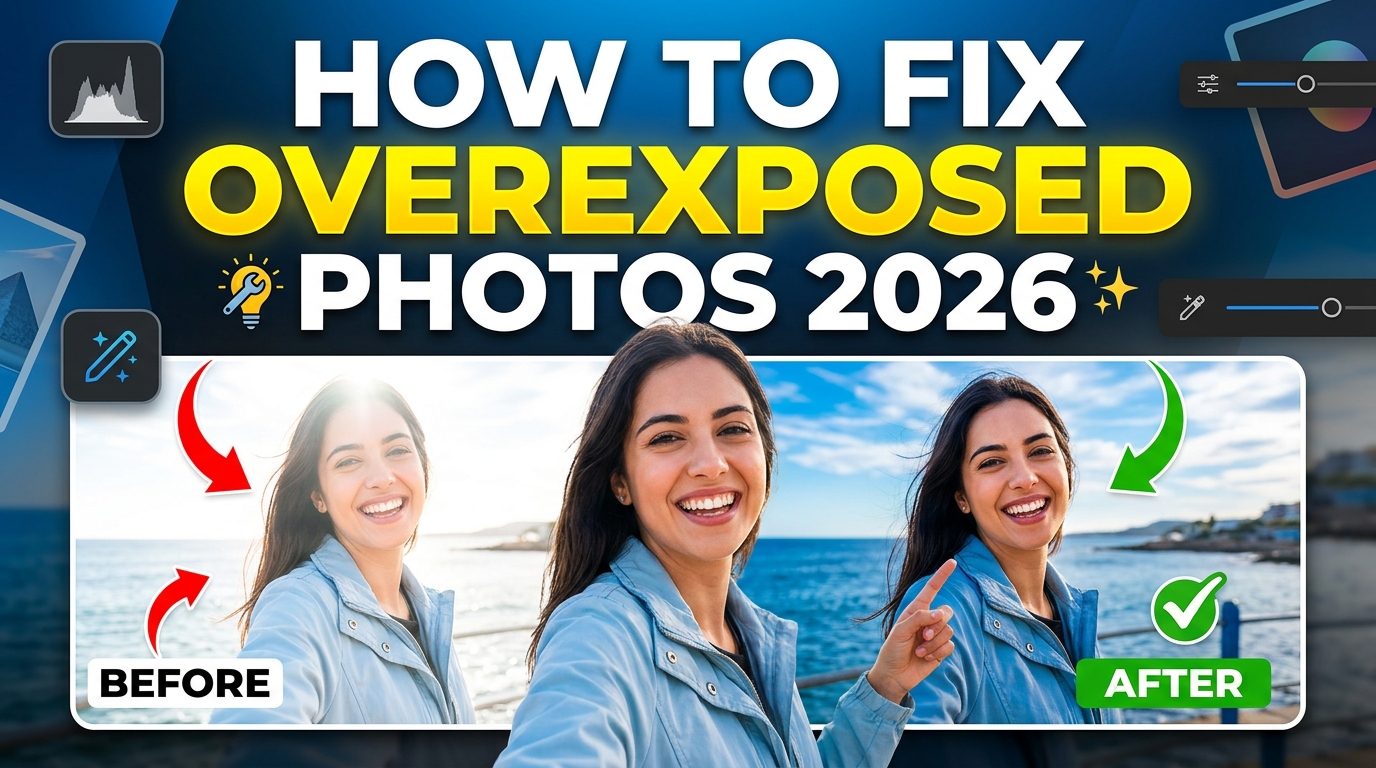
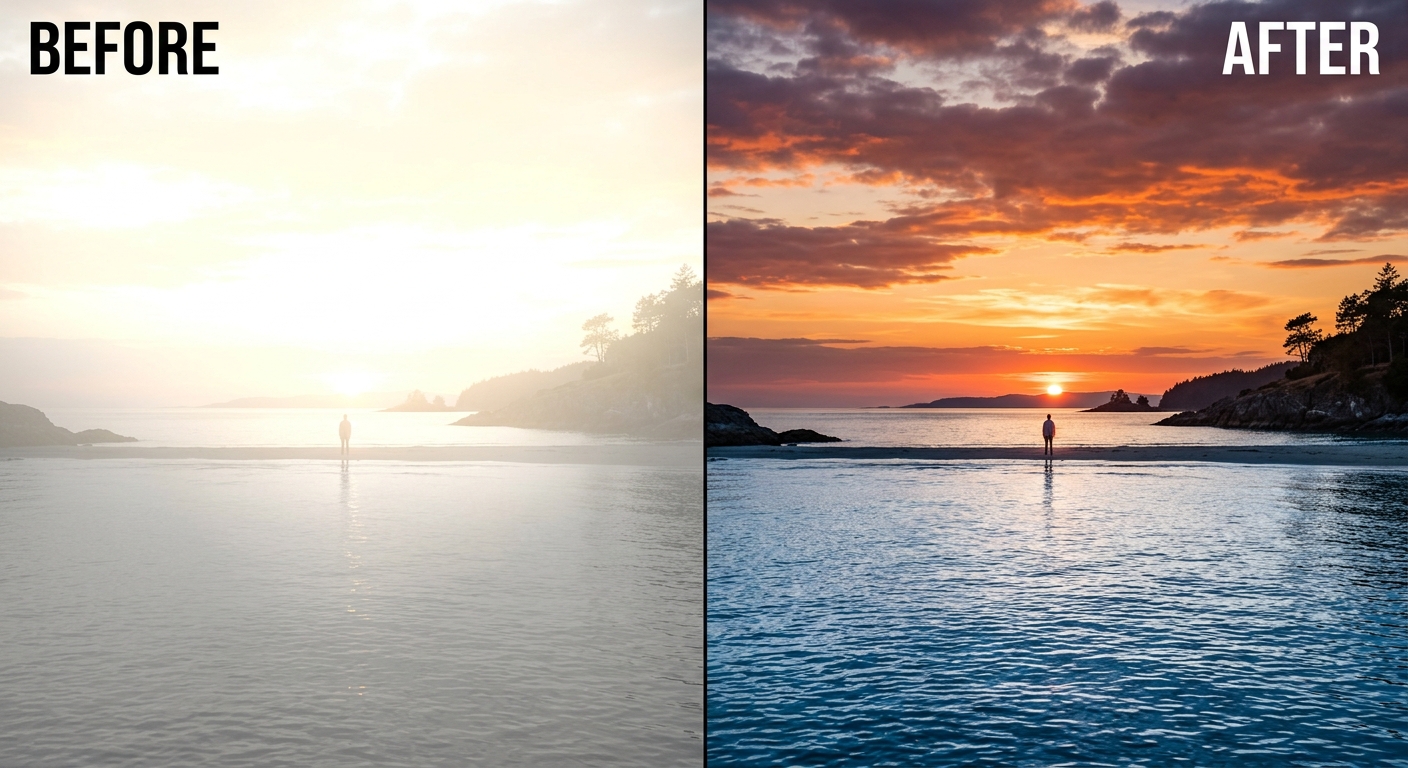
Picture this: You finally nailed that sunset portrait. Golden hour light, perfect pose, everyone’s smiling. You get home, open the photo, and… the sky is completely white. The faces look like ghosts. Overexposure strikes again.
But here’s the thing — most overexposed photos can be saved. And you don’t need a PhD in Photoshop to do it.
In this guide, you’ll learn how to fix overexposed photos using four battle-tested methods — from typing a simple sentence into an AI prompt, to wielding professional software like a pro. Whether you’re rescuing one precious shot or fixing 500 vacation photos, there’s a solution here with your name on it.
☕ Grab a coffee. Let’s fix your photos.
What Is Overexposure and What Causes It?
Understanding Overexposure in Photography
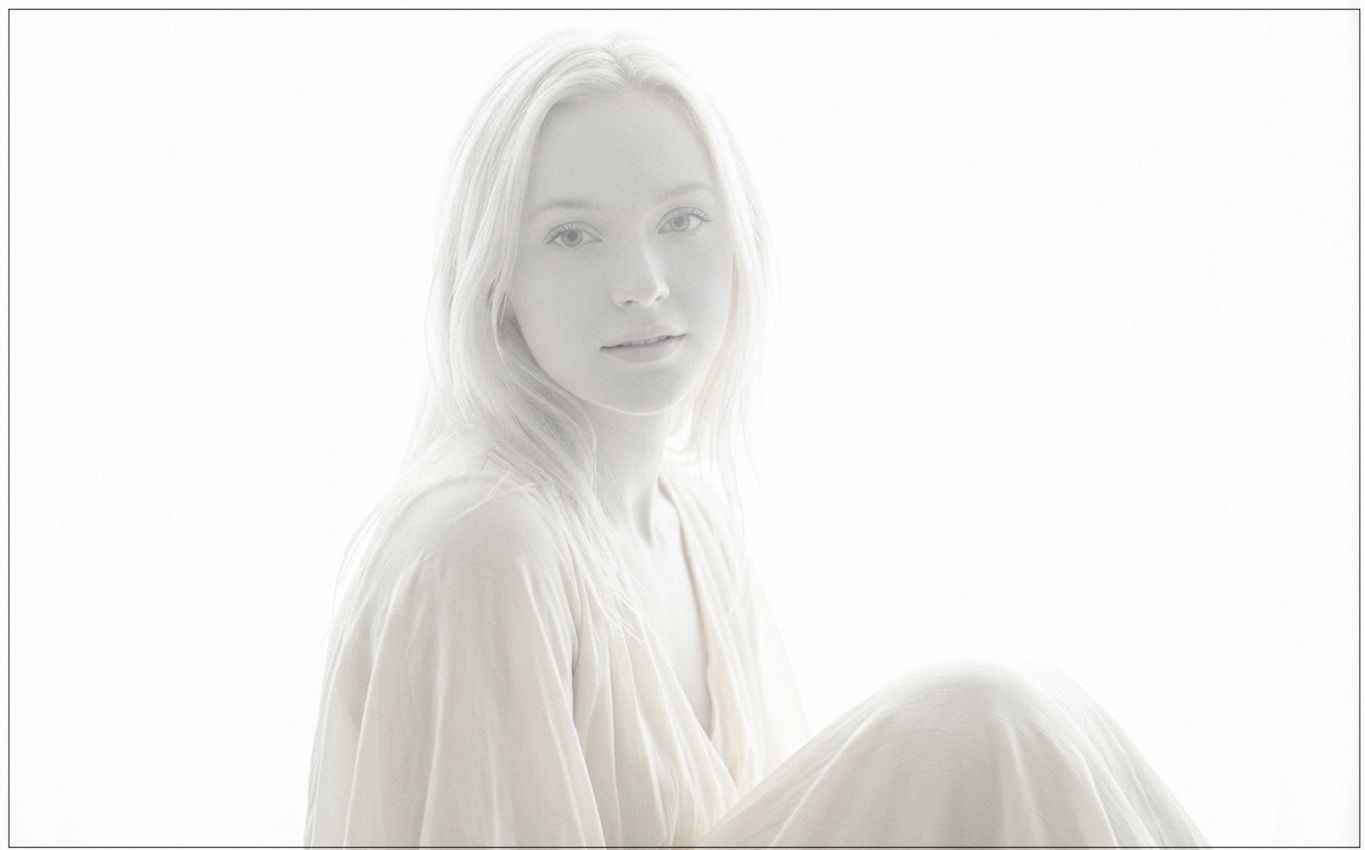
Overexposure happens when too much light hits your camera sensor, causing the brightest parts of your image to blow out into pure white. Those blown-out highlights? They’re not just “bright” — they’re completely missing data. Think of it like spilling white paint on a painting. Once it’s there, you can’t see what was underneath.
Common Causes of Overexposed Photos
| Cause | What’s Happening | The Classic Scenario |
|---|---|---|
| Strong Backlighting | Your camera gets confused by a bright window or sunset behind your subject | The “silhouette that shouldn’t be a silhouette” shot |
| Exposure Compensation Left On | You cranked up brightness for a dark room, then forgot to reset it | Every photo outside now looks nuclear |
| Phone Auto-Exposure | Your smartphone averages the whole scene, nuking the sky to expose the ground | Yet another sunset with a white sky |
| Harsh Midday Sun | Extreme contrast between blazing highlights and deep shadows | Beach photos at noon — enough said |
💡 The Good News: If your overexposure is mild to moderate, there’s a very good chance we can bring those details back from the dead.
How to Fix Overexposed Photos: 4 Methods Ranked by Speed
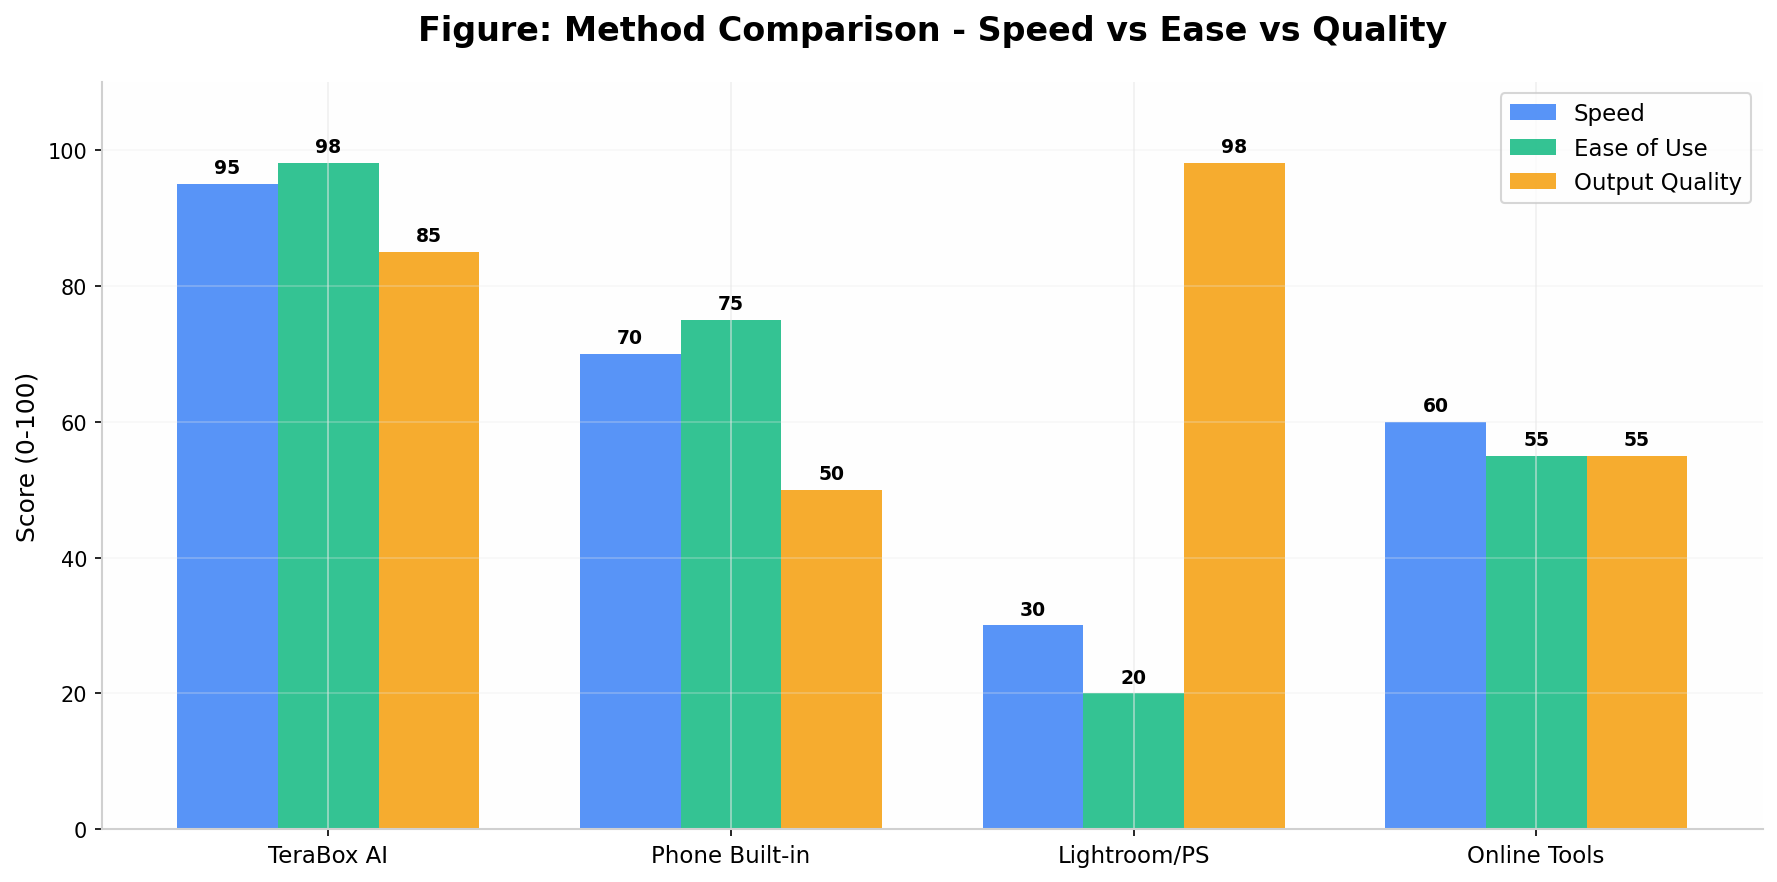
- Fastest: TeraBox AI (type a sentence, done in 60 seconds)
- Quick: Your phone’s built-in editor (2–3 minutes)
- Thorough: Lightroom/Photoshop (10–15 minutes, pro results)
- No-Install: Free online tools (5 minutes, any computer)
Method 1: Fix Overexposed Photos with TeraBox AI (Fastest & Easiest)
Best for: People who want results now without learning software.
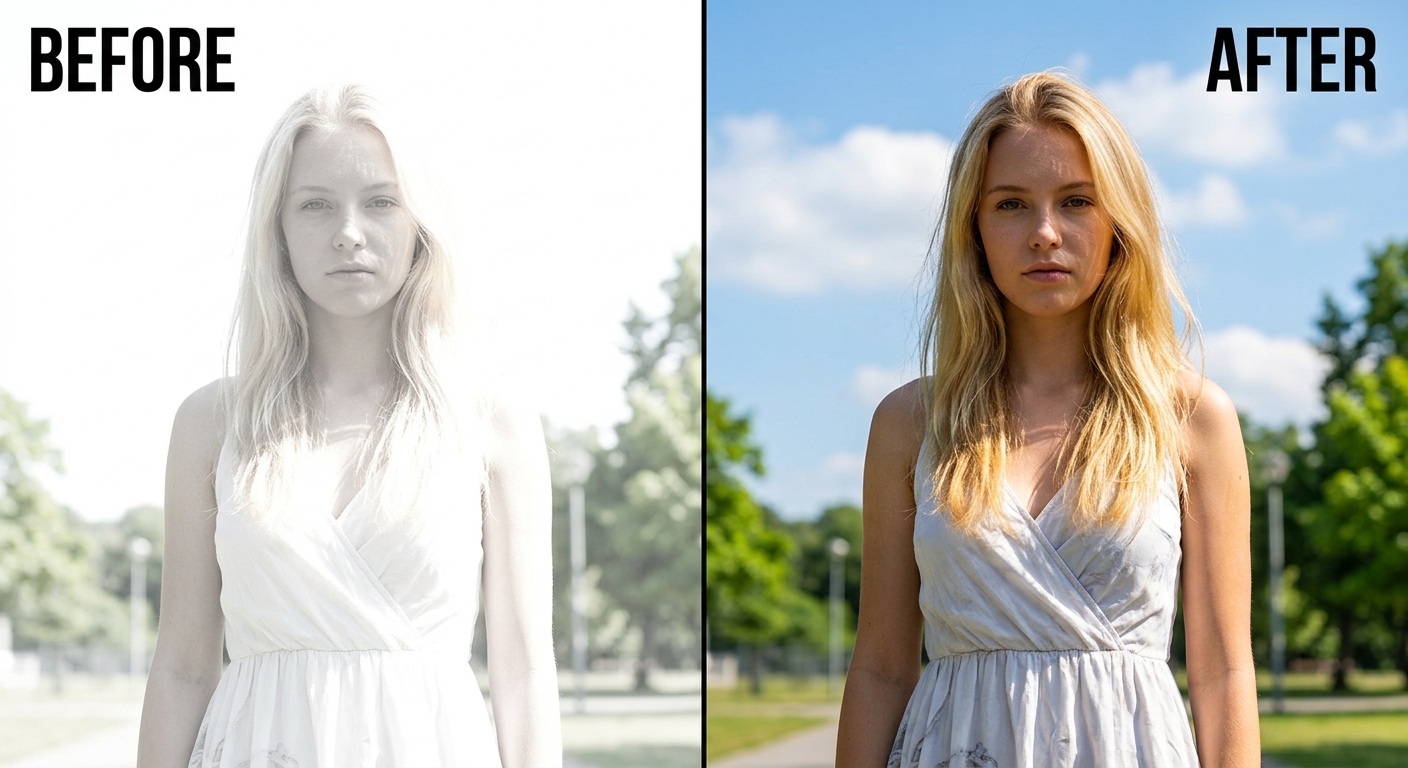
Here’s the magic: instead of fiddling with 12 different sliders and wondering what “clipping” means, you just upload your photo, type what you want fixed in plain English, and the AI does it for you.
TeraBox gives you 1TB of free cloud storage, so you can upload your entire photo library, batch-fix hundreds of overexposed shots, and keep both originals and fixed versions safely backed up.
✅ Why TeraBox AI Wins
| 👍 Pros | 👎 Cons |
|---|---|
| Type a sentence, get a fixed photo | Needs internet connection |
| Zero editing skills required | Extreme cases may need a second prompt |
| 1TB free storage = originals stay safe | — |
| Works on phone, tablet, and desktop | — |
| Other AI tools in one workspace | — |
Step-by-Step: How to Fix Overexposure Using TeraBox AI
Step 1: Upload Your Overexposed Photos to TeraBox
Open the TeraBox app (or web version), and select your overexposed photos.
Step 2: Tell the AI What to Fix (The Prompt)
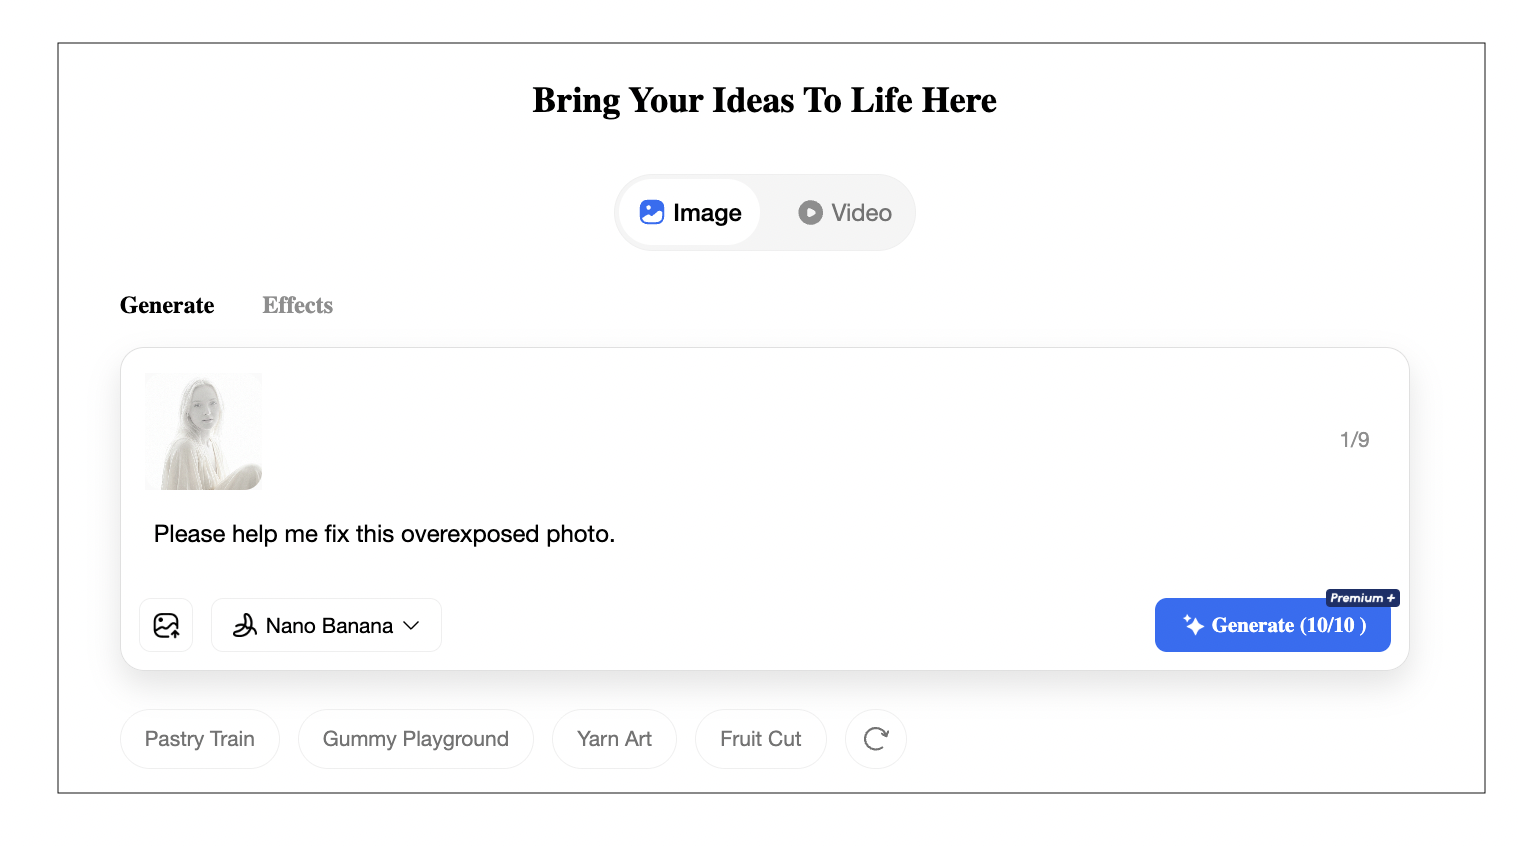
This is where it gets fun. In the prompt field, simply describe what you want. The more specific, the better. Here are 4 copy-paste prompts that work like a charm:
📝 Prompt for Landscapes:
"Fix overexposure, recover blown-out highlights, restore sky details and clouds, and balance the overall exposure while keeping natural colors."
📝 Prompt for Portraits:
"Reduce overexposure on the subject's face, recover highlight details in the background, and make the image look naturally lit with warm skin tones."📝 Prompt for Skies:
"Fix the washed-out sky, bring back blue color and cloud texture, reduce brightness on overexposed areas, and enhance dynamic range."📝 Prompt for General Fix:
"Correct overexposure, restore details in bright areas, deepen shadows slightly for contrast, and maintain accurate colors throughout."💬 Pro Prompting Tip: Mention specific areas (“sky,” “face,” “background”) and what to preserve (“skin tones,” “natural colors”). The AI reads context, not just keywords.
Step 4: Hit Generate
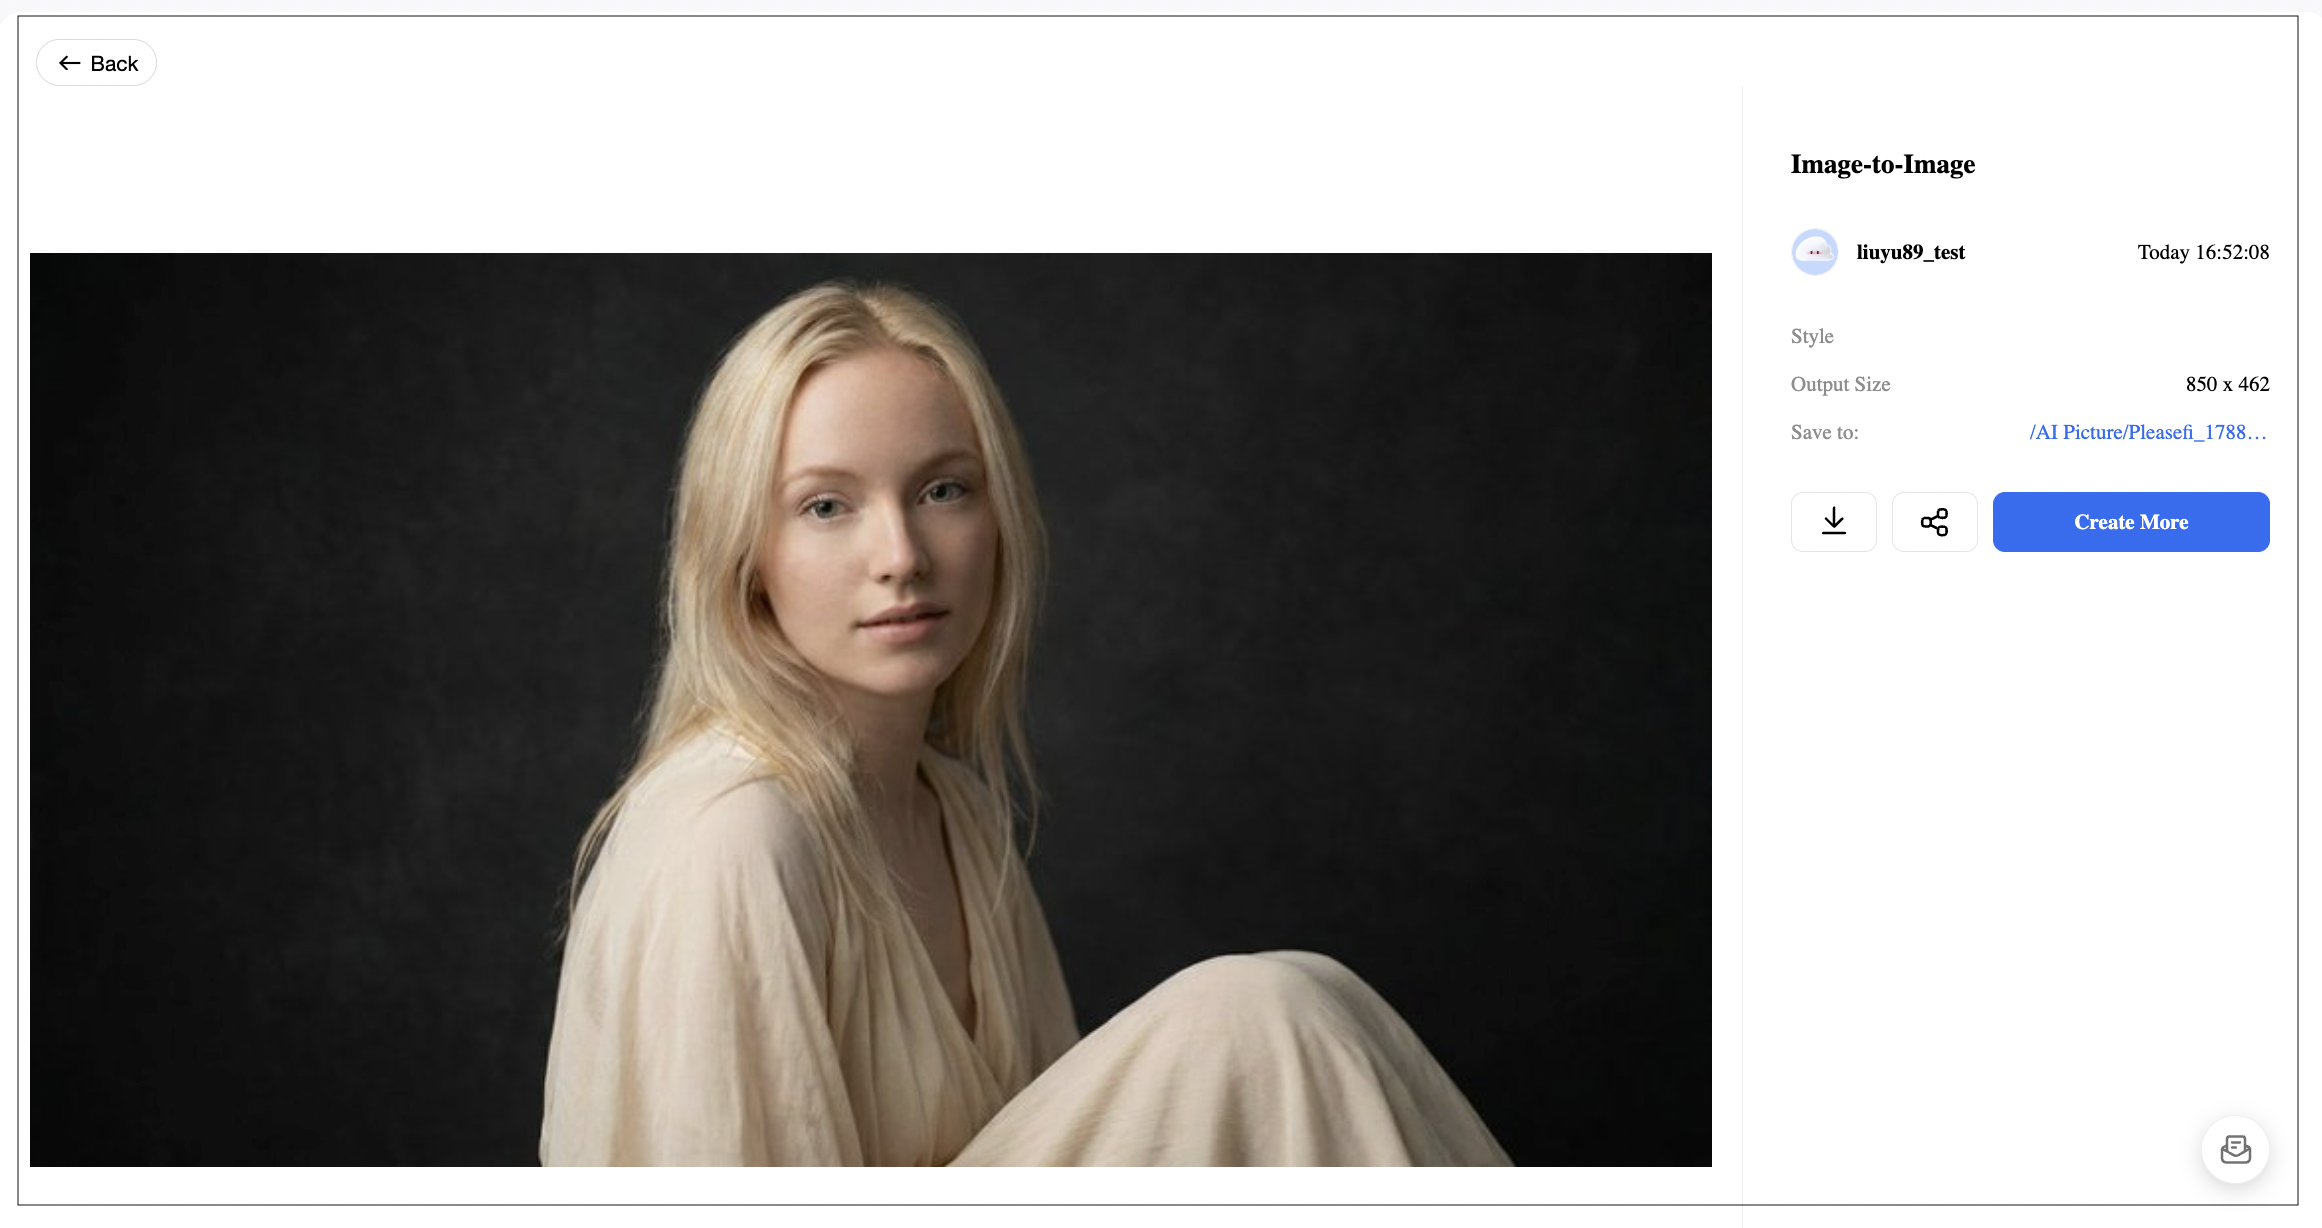
Tap the Generate button. The AI analyzes your photo, identifies the overexposed regions, and reconstructs the lost details. Usually takes 10–30 seconds.
Step 5: Review & Refine (Optional)
Not perfect on the first try? No problem. Just adjust your prompt and hit Generate again.
🎯 Example Refinement:
“The sky is still too bright. Darken the sky more, bring back blue color and cloud texture, but don’t darken the foreground.”“Skin looks a bit gray. Fix overexposure but keep skin tones warm and natural — don’t make the face look artificial.”
Most people nail it in 1–2 tries.
🚀 Get TeraBox Free — 1TB Storage + AI Photo Editor
Fix overexposure, back up your originals, and share your best shots. All in one place.
Method 2: Fix Overexposed Pictures with Built-in Phone Tools
Best for: Quick fixes on the go, minor overexposure.
Your phone already has everything you need for mild cases. No downloads, no accounts, no fuss.
iPhone Photos App
Step 1: Open & Tap Edit
Launch Photos, select your image, tap Edit in the top-right.
Step 2: Lower Exposure
Tap the Adjust icon (the dial). Find the Exposure slider and drag it left to roughly -30 to -50. Watch the brightest areas — if they start showing texture, you’re winning.
Step 3: Recover Highlights
Scroll down to Highlights. Drag left to -40 to -70. This specifically targets the blown-out bits (sky, white walls, windows) without nuking the whole image.
Step 4: Balance with Shadows & Contrast
Your image might look flat now. Lift Shadows to +10~+20 to reveal dark areas. Add Contrast to +5~+15 to bring back depth.
Step 5: Tap Done
iPhone saves your edits as a new version. Original stays safe. Change your mind later? Revert anytime.
⚠️ Reality Check: iPhone tools handle mild overexposure well, but severely blown highlights (pure white with zero data) are beyond its power. For those, jump to Method 1 or 3.
Google Photos (Android)
- Open Google Photos → Select image → Edit
- Tap Adjust → open the Light panel
- Drop Exposure and Highlights
- Use the Pop slider to restore contrast
- Tap Save Copy (keeps the original)
Method 3: Fix Overexposure Using Professional Software
Best for: RAW files, print output, severely overexposed images, and control freaks (in the best way).
When quality is non-negotiable, professional software gives you surgical precision.
Adobe Lightroom Classic
Step 1: Import Your RAW File
Open Lightroom, import your image. RAW files contain 2–3 extra stops of highlight data compared to JPEGs — that’s the difference between “maybe recoverable” and “definitely recoverable.”
Step 2: Drop the Highlights
In the Basic panel, drag Highlights left — typically -80 to -100. Watch the histogram in the top-right. You’re aiming to pull the right edge away from the wall.
Step 3: Adjust Whites
Drag Whites to -20 to -40. While Highlights targets mid-bright tones, Whites controls the absolute brightest pixels — think clouds, snow, white shirts.
Step 4: Lift Shadows
Your image might look dark now. Raise Shadows to +20~+40 to brighten darker areas without reintroducing overexposure.
Step 5: Paint Locally with the Brush
Want to fix only the sky while keeping your subject untouched? Grab the Adjustment Brush (K), set Highlights to -30, and paint over just the sky. Hit O to see your mask in red.
Step 6: Export
File → Export. JPEG at Quality 90–100, sRGB for web. TIFF for print.
Adobe Photoshop (Alternative)
No Lightroom? No problem. Use Filter → Camera Raw Filter — same sliders, same power. For extreme cases, duplicate your layer, set blend mode to Multiply, and mask it to only the overexposed areas.
Further reading:How to Take Professional Headshots at Home: A Complete DIY Guide
Method 4: How to Fix Overexposed Photos Online for Free
Best for: One-off fixes, public computers, or when you can’t install anything.
Photopea (Free Photoshop in Your Browser)
Step 1: Upload
Go to photopea.com. File → Open → select your photo.
Step 2: Levels Adjustment
Image → Adjustments → Levels. Drag the right (white) triangle leftward. Adjust the middle gray triangle for midtones.
Step 3: Shadow/Highlight
Image → Adjustments → Shadow/Highlight. Set Highlights Amount to 30–50%. This tool is built for this exact problem.
Step 4: Export
File → Export As → JPG. Quality 80%+.
Which Method Should You Use?
| Method | Best For | Skill | Time | Cost |
|---|---|---|---|---|
| TeraBox AI | Batch fixes, quick results, non-editors | Beginner | 1–2 min | Free (1TB) |
| Phone Built-in | Quick minor fixes on the go | Beginner | 2–3 min | Free |
| Lightroom/Photoshop | RAW files, pro output, max control | Advanced | 10–15 min | Subscription |
| Online Tools | One-off fixes, any computer | Intermediate | 5 min | Free |
How to Avoid Overexposure Before You Shoot
Fixing is good. Not having to fix is better. Here are 4 habits that’ll save you hours:
1️⃣ Use Exposure Compensation
On your phone: tap to focus, then swipe the sun icon down to darken before you shoot. On cameras: dial in -0.3 to -1.0 EV for bright scenes.
2️⃣ Enable HDR Mode
HDR captures multiple exposures and blends them. Bright sky + dark foreground = both properly exposed. Most phones auto-suggest HDR in high-contrast scenes.
3️⃣ Shoot in RAW Format
If your phone/camera supports RAW (or ProRAW on iPhone), use it. RAW files hold 2–3 extra stops of highlight data — the difference between “oops” and “saved it.”
4️⃣ Use TeraBox Auto Backup
Before any important shoot — weddings, travel, client work — enable Auto Backup. Every shot saves to the cloud instantly. Overexposed a critical photo? Delete and reshoot with confidence. The original attempt is already safe.
🔔 Enable TeraBox Auto Backup before your next big event. Peace of mind, delivered.
Pro Photo Editing Tips for Better Results
Always Work on a Copy
Never overwrite your original. Whether TeraBox AI (auto-saves as new file), Lightroom, or Photoshop — preserve the unedited original. Storage is cheap. Lost memories are not.
Recovering Skin Tones in Portraits
Simply lowering Highlights can make skin look gray and lifeless. After highlight recovery, head to the HSL/Color panel in Lightroom:
- Reduce Orange and Red saturation slightly (-5 to -10)
- Increase Orange Luminance (+10 to +20)
- Result = healthy, natural skin glow restored
When a Photo Is Too Far Gone
Be honest. If the histogram shows a solid vertical wall at the far right edge with no gradual slope, those pixels are permanently clipped. No AI, no software, no wizard can recover detail that was never recorded.
🎯 The Lesson: When in doubt, slightly underexpose. It’s easier to brighten shadows than to recover blown highlights.
Frequently Asked Questions (FAQs)
Can you fix a photo that is too overexposed?
Yes — but it depends. Mild to moderate overexposure (bright but not pure white) can usually be recovered with AI tools like TeraBox, phone editors, or Lightroom. But if highlights are completely clipped (solid white, zero data), recovery is limited or impossible. RAW files give you significantly more rescue room than JPEGs.
What’s the best free app to fix overexposed photos?
For speed and zero learning curve: TeraBox AI. Upload your photo, type a prompt like “fix overexposure and recover sky details,” and the AI generates a corrected version in seconds. Plus you get 1TB of free cloud storage. For manual editing, Google Photos and Photopea are excellent free alternatives.
How do I fix overexposed photos on my iPhone?
Open Photos → Select image → Edit → drop the Exposure slider (-30 to -50) and Highlights slider (-40 to -70). For severe overexposure, use an AI tool like TeraBox or import into Lightroom for more powerful recovery.
Does lowering brightness fix overexposure?
Not really. Lowering overall brightness just makes everything darker — shadows become crushed and lose detail. The correct approach is to reduce Highlights specifically (targeting only the brightest areas) while optionally lifting Shadows to maintain balance.
Can AI really fix overexposed photos?
Absolutely. Modern AI photo editors (like TeraBox’s) analyze overexposed regions and reconstruct plausible detail based on patterns learned from millions of images. AI excels at landscapes, skies, and architecture. For portraits with severe overexposure, a second prompt refinement usually nails the skin tones.
Should I shoot in RAW to prevent overexposure issues?
100% yes. RAW files capture 2–3 additional stops of dynamic range compared to JPEGs. That means if you accidentally overexpose by a stop or two, you can likely recover the highlights in post. Shoot JPEG only, and blown highlights are usually permanent.
The Bottom Line
Overexposure is annoying. But it’s rarely a death sentence for your photo.
| Your Situation | Your Move |
|---|---|
| Need it fixed in 60 seconds? | TeraBox AI — type a prompt, done. |
| Quick fix on the bus? | Phone sliders — Exposure + Highlights. |
| Client work, print quality? | Lightroom/Photoshop — full control. |
| Library computer, no install? | Photopea — browser-based, free. |
The golden rule? Always keep your original file safe. And maybe — just maybe — swipe that exposure down before you tap the shutter.
🚀 Ready to rescue your overexposed photos?
1TB cloud storage. AI Photo Editor. Fix, backup, and share — all in one place.
Got a before-and-after overexposure save you’re proud of? Drop it in the comments — we’d love to see it! 📸