Whether you have personal or business data on your iPhone, it is now essential to create backup. If you don’t want to lose your data, you must back up files from iPhone regularly to ensure reliability. The data can be lost due to hardware failure, software issues, forgotten passcode, etc. Therefore, you should have a backup to restore the data back when you encounter any issues with your device.

iPhone users usually look for various affordable, easy, and quick ways to back up their data. Not everyone can go with expensive cloud storage services or invest time in creating a backup every day. Therefore, there is a need for free online storage that can back up data automatically and make the process easier than ever before.
In this article, we will discuss three ways to back up files from iPhone. We will also share free cloud storage that you can use for your device. Moreover, we will explain the step-by-step procedure to make the whole process easier.
3 Ways to Back Up Files Online for iPhone
There are three common ways to backup files from iPhone. One is iTunes, the second is iCloud, and the third is a third-party cloud storage service. Let’s have a look at how you can back up files online through these methods.
Way 1: iTunes Backup
iTunes backup is the first option if you want to back up all your data. But keep in mind that you can lose this backup if anything terrible happens to your computer.
Follow the steps below.
Step 1: Open iTunes on your PC or Mac.
Step 2: Connect your iPhone to the computer.
Step 3: On your device, tap on Trust This Computer.
Step 4: You will see a mobile icon on iTunes. Click on it and then click on Summary.
Step 5: You will have the backup option there. Click on Back Up Now.
Way 2: iCloud Backup
If you have an iCloud subscription, you can back up your iPhone without using a computer. Follow the steps below.
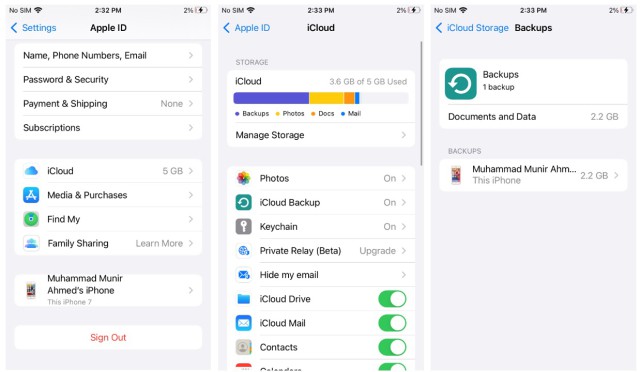
Step 1: Open Settings and tap on your account name.
Step 2: Tap iCloud.
Step 3: Tap iCloud Backup.
Step 4: Finally, tap Back Up Now. Now, the device will automatically create a backup of your data in iCloud.
Way 3: TeraBox
TeraBox is the best option to back up files from iPhone. It is third-party file backup software. There are dozens of features that it offers, but the best thing about it is the 1TB free cloud storage. You can get the storage and backup of your files without paying a penny. Follow the steps below.
Step 1: Download and install TeraBox on your iPhone from the App Store.
Step 2: Launch the application once it is installed. On the main screen, you will see the signup option. Tao on it and create a new account. You can use Facebook, Apple ID, email, or phone number.
Step 3: After logging in, you are ready to create a backup. Tap on the profile icon on the top left corner of the screen. Tap on Automatic Backup.
Step 4: Now, you will see more backup options. You can create an automatic backup of your photos and videos. You only need to tap on the button to activate it. Then, your data will be backed up to the cloud automatically.
How Can I View iPhone Backup Files?
There are different ways to view iPhone backup files, depending on how you created the backup. Therefore, we will discuss the method separately.
View iTunes Backup
iTunes backup is actually stored on your device (Mac or PC). You can go to the location and see if your files are there. But you cannot view the files and data stored in the backup. It can only be viewed if you restore the data on your iPhone.
On Windows, you can go to the Users folder. Click on the Username. Then follow this path AppData > Roaming > Apple Computer > MobileSync > Backup.
On Mac, you can go to this path, ~/Library/Application Support/MobileSync/Backup/.
View iCloud Backup
Similar to iTunes, you only see the location of the iCloud backup. You cannot view iPhone backup files exactly, such as photos or videos until it is restored.
Step 1: Open the Settings app.
Step 2: Tap your name and tap on iCloud.
Step 3: Tap iCloud Backup (iOS 16) or Manage Storage>Backups (iOS 15).
Step 4: You will see the time and date of the last backup. Now, you cannot do anything else than delete this backup.

View Backup on TeraBox
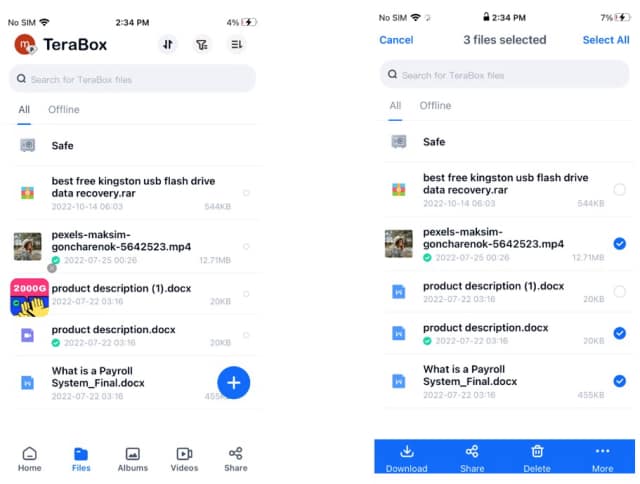
TeraBox is the best option for data backup and recovery. It has tons of features, and it is way easier to upload files and create a backup. Most importantly, you can view the backup whenever you want. You can view the images and video files. You can not only view them, but you can also delete or update them whenever you want. The most important thing is that you can access that backup from any device; you only need to log in to your TeraBox account, and that is it.
Viewing and accessing files on TeraBox is quite easy. You only need to open the application and log into your account. Then, go to the folder where you have created the backup or enabled the automatic backup. You will see all your files there. From there, you can view the files and restore them back to your device.

How TeraBox Makes Cloud Data Backup Easy
TeraBox undoubtedly makes cloud data backup easier than ever before. It is because of various reasons, and we will list them down to give you a complete idea.
- TeraBox offers 1 TB of free storage space that you can use to back up files. The storage is completely free for lifetime, and there is no other service that can offer that much free storage. Secondly, the 1TB free storage can also be increased by signing in daily, completing daily challenges, and inviting more friends. You can get over 2000GB of additional space.
- The automatic backup of TeraBox automates the backup process. With that being said, once you select videos or images for the backup, the files are automatically uploaded and updated to the drive. It is done in real-time, so the reliability is further increased.
- You can use TeraBox on your Android, iPhone, Mac, or PC. The applications are available, and you can back up data from multiple devices at a time. Therefore, this one cloud storage is more than enough for all your devices.
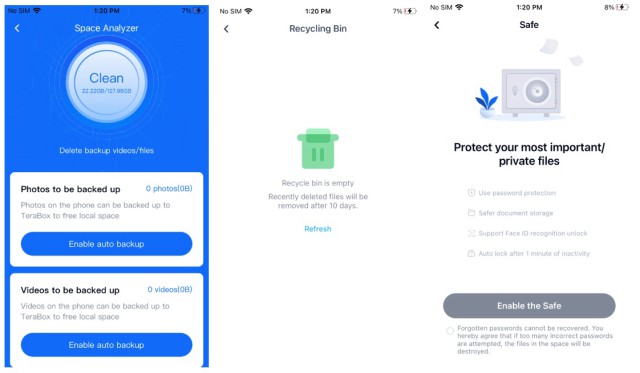
- The Space Analyzer of TeraBox keeps track of the files that are uploaded. It helps you make more space on the device by deleting duplicate files and files that are already backed up. You only need to tap once to get everything done.
- In case of accidental deletion from the cloud, you can still recover the files from Recycle Bin. The data is kept for several days, and you can easily restore it.
- The Personal Vault of TeraBox is more than exceptional. It allows you to protect your data through an additional password. So, you can also back up some important files here.
- You can easily transfer your backup to any device and download it without any hassle. The best part is that you can share large files with anyone you want and set a password and validity period of the link.

Final Thoughts
Creating a backup is undoubtedly necessary these days to ensure data safety. Once you back up files, you can restore them whenever you want. You don’t need to worry about changing the device, data corruption, or hardware failure. Your data is safe and sound in the cloud. We have shared three ways for iPhone cloud data backup. You can use iCloud or iTunes, but these methods are not that reliable. iCloud is very expensive, and iTunes backup is stored on your computer, which is again a threat to the reliability of your data.
The best option is to backup file online on free storage, TeraBox. It offers 1TB of free space where you can create a backup without any hassle. The space is free for a lifetime, and you can also create an automatic backup to upload your files automatically. It works on all devices, so it makes creating backup files on your smartphone or computer easier than ever before. Secondly, you get many features, such as the Space Analyzer, Recycle Bin, and Private Space. Download TeraBox free and backup file online.


![12 Best AI Presentation Makers to Try in 2025 [Free & Paid] 127 new 图片1](https://dr80rrrj8r45p.cloudfront.net/wp-content/uploads/2025/05/new-图片1-242x140.jpg)